Hello again, not many of you may know this, but the awesome site that was canadiannerfers.com has ceased to be active. The Canadian Nerf community has pretty much faltered and died. However, there is a new Canadian Nerf forum that has been created in order to help rejuvenate this strong and proud community. You can find it at cananerf.forumotion.com. Any Canadian Nerfer searching for a community to be part of can find sanctuary here. The moderation will also be more kind than that of NerfHaven, so you can flex your creative muscles without fear.
Anyways, if you are a Canadian who nerds, I would strongly recommend this new forum to you. We can bring this country back together!
Friday, 16 August 2013

Monday, 29 July 2013
Another Tek-3 Challenge Entry Review.
Hello again, sorry for the lack of pictures, but you can basically see everything that needs to be seen about this blaster in its YouTube review video. I can always upload pictures in case anybody ends up caring.
I really enjoyed making this thing, and I love just shooting it around for fun. Be sure to check back here often for more in-depth reviews of my modded blasters, especially the more complex and cool ones like the Fireskorpion.
See ya later,
Erfnay
I really enjoyed making this thing, and I love just shooting it around for fun. Be sure to check back here often for more in-depth reviews of my modded blasters, especially the more complex and cool ones like the Fireskorpion.
See ya later,
Erfnay
Sunday, 21 July 2013
The First of the Tek-3 Challenge Winners: ModifyThisHLD
Hey there readers, I just thought that I would share the first of my recreations of the blasters submitted to the Tek-3 challenge. The first blaster that I made was ModifyThisHLD's Tek-3 manta ray. He did a pretty good job making his blaster, and I enjoyed making my version.


This is how the mod turned out, and I think that it looks pretty sweet.

Hopefully you enjoyed seeing this cool modded blaster, even if it is a Tek-3. Check out my video review of the blaster for a firing demonstration, and for a different point of view on the mod.
Thursday, 18 July 2013
Its Midnight Again!
Hey all! I was up late again working on a sick blaster to integrate into my rescued Tripleshot, and ended up creating this thing:

I'm not really sure what to call it yet, other than awesome, but it seems to be working quite well. Its also given me something to do with the leftover Tek-3s from the Tek-3 challenge. The only problem that I have with it is that the turret isn't quite the right design or size to accomodate rear loading, so I'm going to have to ramrod all of the darts into the barrels.
Check out this video where I talk about some of the cool parts of this blaster, as well as fire it.

Check out this video where I talk about some of the cool parts of this blaster, as well as fire it.
Wednesday, 17 July 2013
Now on Facebook and Twitter!
Friday, 28 June 2013
The End of the Tek-3 Challenge
Hello again, good to see you so soon. I need to notify you that the Tek-3 challenge will be ending on July first, so remember to submit your videos of your finished mods as a video response to this video right here:
That's all for today folks, but I know that I shall see you again, hopefully in the near future.
Tuesday, 25 June 2013
Whoa! New post? What's going on?!
Hello once again, those who actually check up on this page. I've decided to try to post more on this blog now that I'm out of school for the summer, so you can look forward to that, in the event that you actually enjoy reading this page. Also, I am planning on using this site as a means to organize future western canadian nerf events, for I'm really interested in starting a new community out here. If you are at all interested in nerfing here or want to host a war in Western Canada, please contact me and I'll see what I can do for you.
Anyways, as you may know, I have been working on the same project for the past few months and posting regular updates on my youtube channel about what I call the Fireskorpion.

As you can see, the blaster is finished now, and is hitting a respectable eighty feet fired paralell to the ground. For those of you who don't know, the Fireskorpion is a firefly shell that has a Scorpion Bow plunger tube inside. I really enjoy how the paintjob has turned out, and I have even added some cool LEDs to the shell.
These LEDs are kind of my way to make up for removing the old Firefly flash accessory, but the old dart glow mechanic doesn't really work so well with cpvc barrels.


Getting this piece, which functions as the catch is crucial for the function of the blaster, for it determines where the plunger tube is placed relative to the turret. Having the catch even a millimeter off will cause a bad seal between the plunger tube and turret.

Overall, this blaster was an extremely rewarding yet challenging experience. I would highly recommend building one if you have the time and patience to do so. I really enjoy how the blaster has turned out, and I know that you are too. Check out this youtube video for a video overview and firing demonstration.
Thanks for reading,
Erfnay.
Anyways, as you may know, I have been working on the same project for the past few months and posting regular updates on my youtube channel about what I call the Fireskorpion.

As you can see, the blaster is finished now, and is hitting a respectable eighty feet fired paralell to the ground. For those of you who don't know, the Fireskorpion is a firefly shell that has a Scorpion Bow plunger tube inside. I really enjoy how the paintjob has turned out, and I have even added some cool LEDs to the shell.
 |
I've also done some serious internal work to get this thing absolutely perfect. The hardest part in the whole process however, was in getting the plunger tube to seal with the turret. It took me a long time to get the system optimized, but I believe that the effort was truly worth it.

The internal mechanism is actually quite simple, apart from the timing, which took some time to get right. However, the trigger system works exactly like a snap, only pressed by a metal bar and not a finger.


Overall, this blaster was an extremely rewarding yet challenging experience. I would highly recommend building one if you have the time and patience to do so. I really enjoy how the blaster has turned out, and I know that you are too. Check out this youtube video for a video overview and firing demonstration.
Thanks for reading,
Erfnay.
Saturday, 30 March 2013
Panther Arm Cannon V2
Hey! I realize that I haven't been updating this account that often, but I'm going to try to post content more regularly now. What I've got to show you today is my new Panther Arm Cannon.

 This version of the arm mounted blaster only uses one Panther tank, but has a rear loading tripleshot turret to compensate. It can actually fire quite quickly, only needing five pumps to fire. The V2 hits about 90 feet according to my measurements, which isn't bad considering that the turret seal could be better.
 This is how my hand fits in. It looks cramped, but is actually very comfortable.

 The tank is held in by the odd piece that connects the pump to the tank in the stock shell. None of the tubing interferes with my hand.

Just the rear loading slots. The flash makes it look like a white mass, but it's actually 1/2" PVC epoxied in. This really helps load the turret.


The trigger is solidly attached right beneath my index finger, so firing is just as comfortable as holding the blaster. I have had no issues with accidentally pressing the backpressure valve in this location.


Just the rear loading slots. The flash makes it look like a white mass, but it's actually 1/2" PVC epoxied in. This really helps load the turret.
Check out this youtube video for a better look at this blaster and its functionality.
Overall, this arm cannon is a worthy addition to my inventory, and I am very glad that I made it. thank you all for reading, and supporting my youtube channel. Hope you enjoyed, and I'll see you next time.
Wednesday, 12 September 2012
Arm Cannon!!!
Well, I haven't updated very recently, but I have a couple of good reasons for that, one being school and the second being this:


Yes, It is an arm cannon made of panthers. You hate me now. This was going smoothly until I realized that I didn't have anything that could vent it fast enough. Any ideas would be appreciated. Thanks.
Erfnay.
Thursday, 30 August 2012
The Finished Panther
I finally finished painting the Panther that I did a modification tutorial on. It works really well - getting great ranges with 4 - 5 pumps. As you can see in the tutorial, I PVC couplered it and replaced the pump with a dual action bike pump. What I didn't show in the tutorial was the sweet paint job that I gave it.


I themed the paint job after a black panther because the blaster is called a panther, just as a joke. I think that it turned out remarkably well, especially the eyes. The reason I added the white and gold, aside from aesthetics, was to keep it from looking like a real weapon.
Because I replaced the pump, and didn't want a hole where the stock pump used to be, I machined these polycarbonate plates for the front of the shell.

I just used my scroll saw to roughly cut out a rough outline of the front of the shell, and then sanded it down to fit perfectly. I then cut it in half down the centre to allow the shell to open.
I am really impressed with this blaster, for it shoots extremely well and looks really cool.

The Youtube Video
Monday, 20 August 2012
Tips for Nitemav Creation
I have been getting a lot of interest in my Nitemav over the last while, so I thought that I would share some internal pics with the general public.

Here are the internals, which took me a long time to perfect. The trigger was not particularly troublesome, but you have to make sure to shave down the maverick internals where the nitefinder catch goes.


Here are the internals, which took me a long time to perfect. The trigger was not particularly troublesome, but you have to make sure to shave down the maverick internals where the nitefinder catch goes.

Sealing the plunger tube to the turret was the real problem that I had, for the turret refused to rotate once I had a good seal. Once the turret would rotate, my seal was bad. My fix for this, as was also recommended in Rogue's writeup, was to glue craft foam to the plunger tube and then rotate the turret several hundred times. This squeezed the foam enough that it still formed a good seal, but also allowed the turret to rotate.

The last thing that I did, was to add this spring to the trigger:

Doing so helps the turrets rotation, for the trigger returning forward advances the turret the rest of the way. Without it, I could only shoot the gun once before having to rotate the turret manually.
I highly recommend making Nitemavs, for they make great sidearms and look great when painted.
Don't forget to check out the youtube video!
I hope this was helpful for anyone interested.
Wednesday, 15 August 2012
The Sinkfinder
Welcome! One of the ways I will be using this blog, is to give you more information about the modifications that I post on my channel. This will be a more efficient way of conveying small details that turn short videos into extremely long ones. Let's dive right in to this first gun.

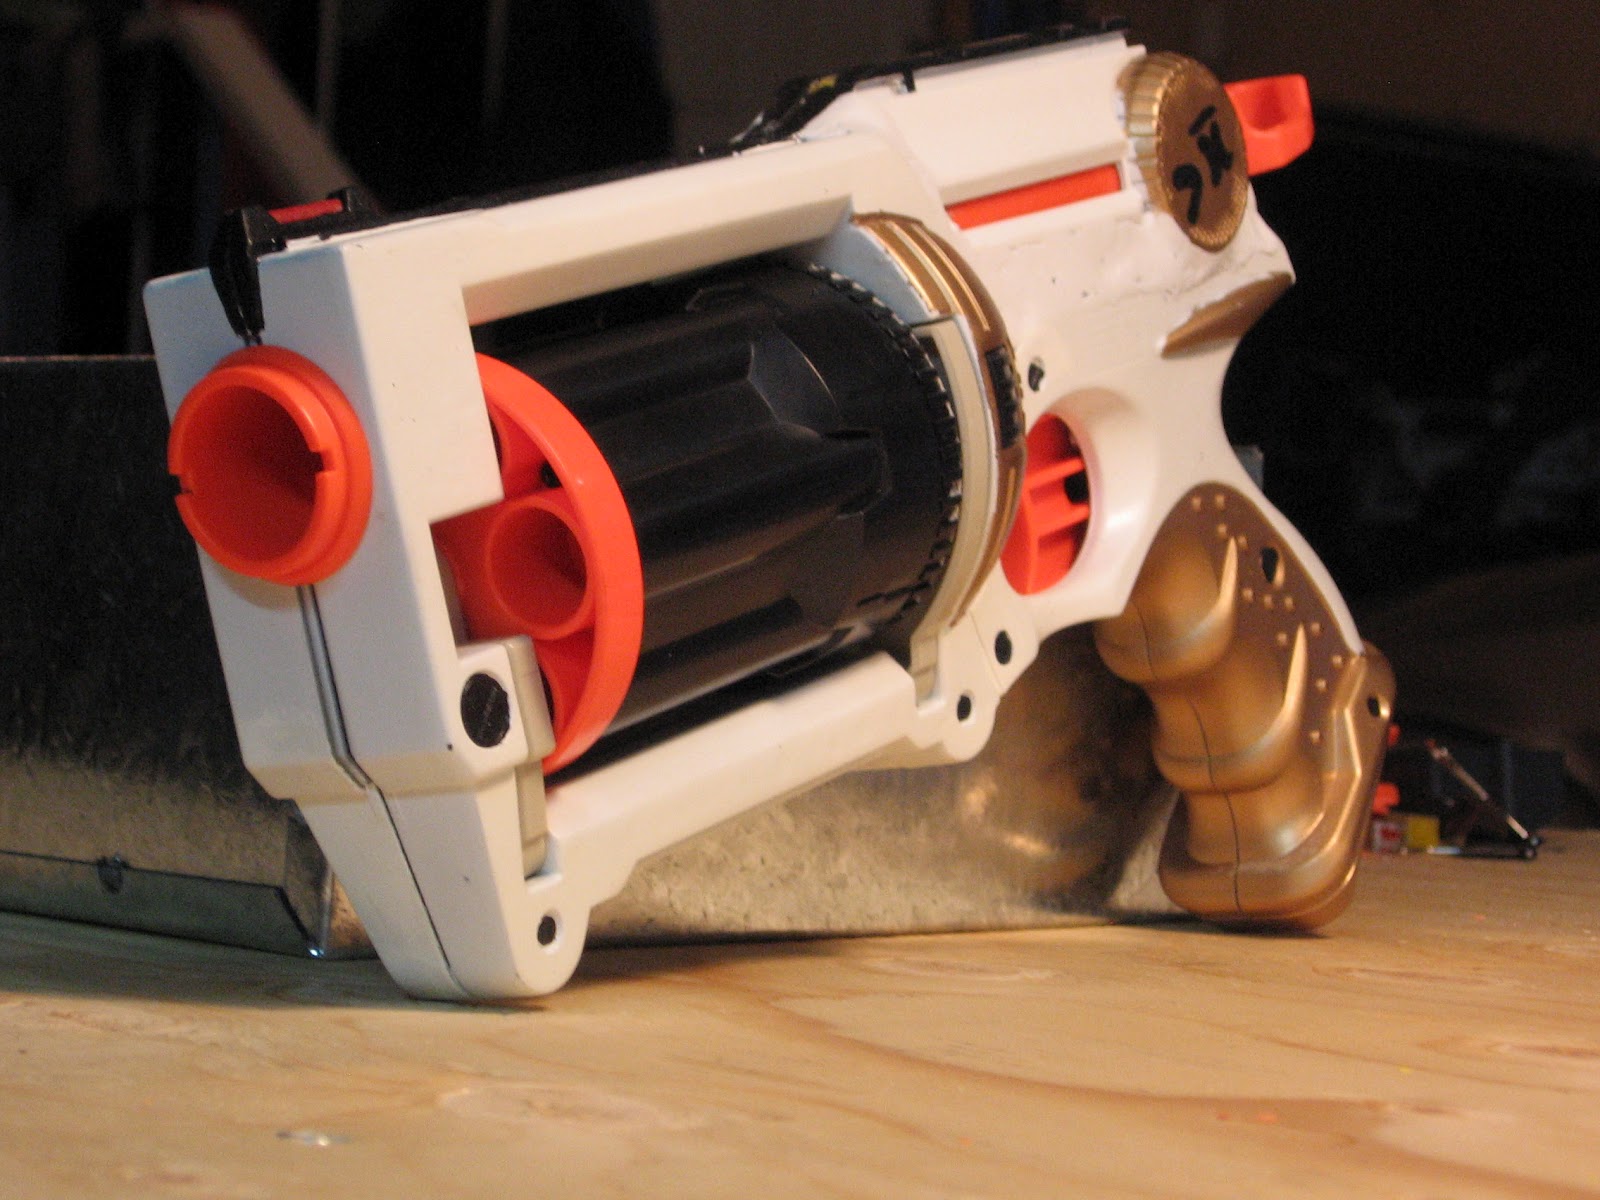
First off, I call this the sink finder because it is made out of parts that are normally found in a sink- like the 1 1/2" sink drain that I am using as a plunger tube, and the 1 1/4" bathtub or drain plug that I am using as a plunger head.

I attached this to the stock nitefinder plunger rod with washers on either side to ensure it isn't ripped apart by the spring. I clipped down the edges of the bathtub plug so that it still has a great seal, but slides very easily through the plunger tube. You are going to have poor ranges if your plunger rod doesn't move quickly- regardless of how good your seal is.
This blaster has a super cool holster too. I got the idea when koree posted this writeup on Nerfhaven. A magnetic holster sounded pretty cool to me, so I thought I would try it. The dots epoxy puttied on the side of the blaster are the magnets, which attach to the magnets on this strip covered in duct tape like so:

The strip has belt loops in it so that it is actually usable as a holster. I can run around with the blaster attached with no problems, even when jumping. The magnets do yield when I pull the blaster off to fire- it would be kind of embarrassing if they didn't.
Because I have so many different barrel systems that I use on nerf guns, I wanted to be able to use the widest variety with this blaster. It is my primary after all. I installed a universal coupler system so that I could achieve just that. Getting the cpvc coupler to stay in was a pain, but I finally got it to stick using gorilla glue. Now I can use a super modern speedloader! They have the highest rate of fire ever!</sarcasm>

Anyways, this was a fun project to do, and well worth the time and effort. I am currently hitting 90+ feet with it. I hope you enjoyed, and will see you next time.
See the Youtube video!

The symbol on the side means "greater than average" in mathematical terms.

I attached this to the stock nitefinder plunger rod with washers on either side to ensure it isn't ripped apart by the spring. I clipped down the edges of the bathtub plug so that it still has a great seal, but slides very easily through the plunger tube. You are going to have poor ranges if your plunger rod doesn't move quickly- regardless of how good your seal is.
This blaster has a super cool holster too. I got the idea when koree posted this writeup on Nerfhaven. A magnetic holster sounded pretty cool to me, so I thought I would try it. The dots epoxy puttied on the side of the blaster are the magnets, which attach to the magnets on this strip covered in duct tape like so:

The strip has belt loops in it so that it is actually usable as a holster. I can run around with the blaster attached with no problems, even when jumping. The magnets do yield when I pull the blaster off to fire- it would be kind of embarrassing if they didn't.
Because I have so many different barrel systems that I use on nerf guns, I wanted to be able to use the widest variety with this blaster. It is my primary after all. I installed a universal coupler system so that I could achieve just that. Getting the cpvc coupler to stay in was a pain, but I finally got it to stick using gorilla glue. Now I can use a super modern speedloader! They have the highest rate of fire ever!</sarcasm>

See the Youtube video!
Subscribe to:
Posts (Atom)